Showing posts with label diy. Show all posts

Tuesday, July 3, 2012

Stars and Stripes

Hello again!

Today I have a wonderful diy project for making an American flag shirt for Independence Day! My next post will be an outfit post so stay tuned for that, but for those of you who like to get creative and turn something old and boring into something new then get ready to be amazed. Turning a plain white tee into a new personal, vintage-looking item is simple as well as inexpensive.

Materials:
  • Plain T-shirt
  • Straight edge
  • Dark blue and red acrylic paint
  • Paint brush
  • Cardboard
  • Scissors
1. Start with a plain T-shirt in whatever color you like! V-necks or scoop-necks would add some character.
Place a piece of cardboard into the shirt so the paint does not seep through to the back.


2. Use a straight edge to paint the stripes using red acrylic paint in whichever direction you want.


3. Make sure the width of the red stripes is the same as the width of the white stripes. Remember there are seven red stripes and six white stripes on the American flag (unfortunately I could not fit that many!)


4. Fill in the red stripes however you want. I went for a more "worn" look with faded ends.


5. Cut a star shape out of cardboard and paint the dark blue over it so that when you remove it, a white star remains.


6. Fill in the rest of the blue area and add as many stars as you can fit on the shirt, but don't go over 50!


7. To make the shirt even more faded I washed it inside out in cold water, then tumbled dry and ironed it.


This is really simple and you can do virtually any design you can draw so don't throw out that old boring tee in your closet, make it into something you'll want to wear all the time. I really love the result and I cannot wait to wear it tomorrow at my brother's barbeque. Food and fireworks here I come, I promise I will take a lot of pictures!

Happy Fourth of July!


Friday, June 29, 2012

Glitter Tipped Nails!

Hello lovelies!!!

Okay so it has been almost one year since my last post and I never realized how busy I was going to be with school (priorities!). My summer classes are coming to an end so I may post more frequently, but I cannot help but take studying more seriously than this blog, which is more of a fun side project.

With that said I have a wonderful diy for you ladies who love different nail styles, but just do not have the cashola to go get them done all the time!


Everyone knows I have a seriously bad habit of biting my nails. I know it's horrible! Life can be so stressful at times as many of you know, but the best remedy for my bad habit it to actually paint my nails frequently. When I do I find that my nails have a chance to grow before I can start chomping away at them. So amazingly my nails are semi-grown-out at the moment and I decided to show you a cute way to paint your own (especially if you have a nasty nail-biting habit like myself!)


 I used Hot Tamale from Love My Nails (the vibrant orange is a favorite of mine) and painted Essie's A Cut Above on the tips. I applied Revlon's Sealing Shine top coat and viola! Extremely simple and you can use any color combination you can think of!

I know the pictures may not exactly do these justice and I know many people hate pairing oranges with pinks (I used to be one of them!), but I gotta say the combo is really growing on me and I was extremely happy for how these came out. Do you have a favorite nail polish duo?


Friday, July 15, 2011

Splatter Shirt DIY

Paint splatter prints can be a fun addition to a drab wardrobe so today we bring you a simple do it yourself project for those plain or stained shirts you just are not ready to part with yet.


What you will need:
  • A shirt
  • Bleach
  • Gloves
  • Lots of newspaper
 1. Make sure you do this outside, this could get messy (and remember not to wear nice things!). Spread out lots of newspaper and make sure you put several sheets in the shirt so the bleach doesn't seep through.

2. Wearing gloves proceed to splatter the shirt. We used pure bleach to get a white splatter, but you can dilute it with water to achieve a lighter shade. The amount of splattering you do is purely your own decision.

3. Let it dry after you have done both sides and then put it through the wash. We recommend you wash it separately in cold water and without any laundry soap!

4. Enjoy!


(Please excuse the fog on the last pictures, I forgot going from indoors to the blazing Florida outdoors would make my camera fog!)

Thursday, July 14, 2011

Gryffindor and Slytherin

Tonight is the very last Harry Potter movie. You should know Brittany and I are very big Potterheads and we've been counting down all this week to the last movie. It's going to be epic!

In honor of our Harry Potter childhood, we decided to get a little festive with our nails. I did Gryffindor colors and Brittany went with Slytherin. That pretty much sums up our personalities...

I'm only kidding. Brittany is nothing like Voldemort or the Malfoys. Anywaaaay.


There was no fancy nail polish we used, so I won't list the brands. We literally scavenged the cabinets for colors and used acrylic paint when we couldn't find a color. Designs painted by hand.

Who else is excited for The Deathly Hallows Part 2?


Wednesday, June 8, 2011

Dresser Facelift

Brittany decided over the weekend to add a dresser to her room. Since she wasn't about to drop any kind of serious money (have you seen furniture prices?!) she decided to find something off craigslist and fix it up. It was Brittany's first restoration and my third.

What we used:
  • Sander 
  • 2 kinds of sandpaper, a rough one and a smooth one.
  • Krylon indoor/outdoor white spray primer
  • Painter's Touch semi gloss latex paint
  • Paint brush
  This is the dresser, bought for $40. It's a real looker!

It was sanded first with the rougher sandpaper to smooth out the dents and scratches and then with the smoother sandpaper to polish the surface all uniform.

My camera died, so I'm missing pictures of the primer and stage. But the dresser was primed and left to dry. Then it was painted with the semi gloss paint. Brittany ended up doing 4 coats before she was satisfied with it.

The final product:


Saturday, May 28, 2011

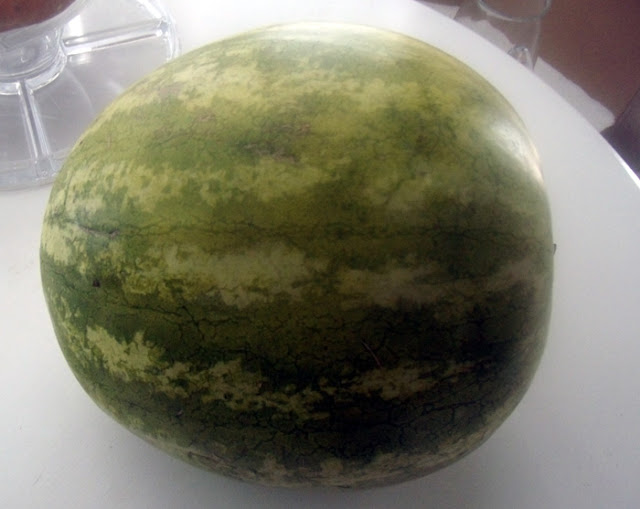
Watermelon Whales


 It's been a busy graduation weekend. Our brother graduates today, so there has been quite a few parties already this week. As a gift for one of the parties yesterday Brittany decided to carve a watermelon and make a fruit basket. After much googling between the two of us we found the watermelon whale. She changed it up a little, but here's a cute DIY if you have a little patience and skill with a knife (I don't, so Brittany did all the carving!).


1. Pick a melon, make sure it's ripe and delicious.


2. Brittany did it freehand. But find a design and marker it on.


3. Carve him hollow. I've seen some cute melons where they used an ice cream scoop to make watermelon balls to put back in the fruit salad. I was too late suggesting it in this case.

4. Give him eyes and a spout. She used a perminant marker and a little confetti thing for the spout. Get creative!

5. Lastly, fill him with fruit of your choosing and enjoy!
Hope everyone's having a great Memorial Day weekend!

Wednesday, May 18, 2011

Can Tab DIY

For our first DIY, we bring you a pretty simple project. I saw this project somewhere on the internet years and years ago and made a can-tab belt that both of us wear. Brittany says she almost always gets compliments when she's wearing it.


What you will need:

  • Twine, fishing line or some other string for threading. Make sure it is durable!
  • Scissors
  • Can tabs
  • Not pictured: a button or hook if you want something fancier than just tying the ends together.
Note: The amount of can tabs depends on what you're making and your size. For the 33in belt we used 102 tabs and for the bracelet we used about 25 tabs.

Process:
1. Cut a bit of twine twice as long as your wrist or waist.
2. Find the middle of the twine. Make a small loop and tie it to the first tab. You can see this better in the picture below.
3. With one string you weave it in and out of the other tabs top hole to create a chain.
4. With the second string you weave it in and out of the bottom holes.
5. Keep doing this as long as you need to get the length you want. Feel free to measure yourself up to get it right!
6. When the length is right tie the end so the tabs are all secure.
7. At this point you can put it on and tie the ends to the beginning or did like we did and thread the twine through a button so that it hooks through the beginning loop.


And tah-dah! You have a brand new belt or bracelet that didn't cost you nearly anything!

If you've got any tips or variations or pictures, we'd love to see them in the comments!